Monday, January 30, 2012

Mother/ Daughter Day

So it's just one of the months where everything seems to be happening all at the same time! I was gone for two three-day weekends in a ROW! So by the end of all that my daughter was REALLY needing some mommy time! Which wasn't that hard to oblige her with! Since we are both off on Fridays I told her at the beginning of the week that Friday was girls day! I built it up all week, reminding her and telling her I had a surprise for what we would do that day. I came up with a Photo Scavenger Hunt!

The idea was this: Everywhere we went that day and everything we did - she had a checklist that she had to complete of items to take a picture of!

So for example - our first stop was Hobby Lobby. I needed a couple things and she actually enjoys shopping with me so on her checklist for Hobby Lobby were the following things:

1. Something made of glass
2. Something made of wood
3. A decorative basket
4. A mirror

I think that store was definitely the easiest because I mean holy cow the options are endless!!
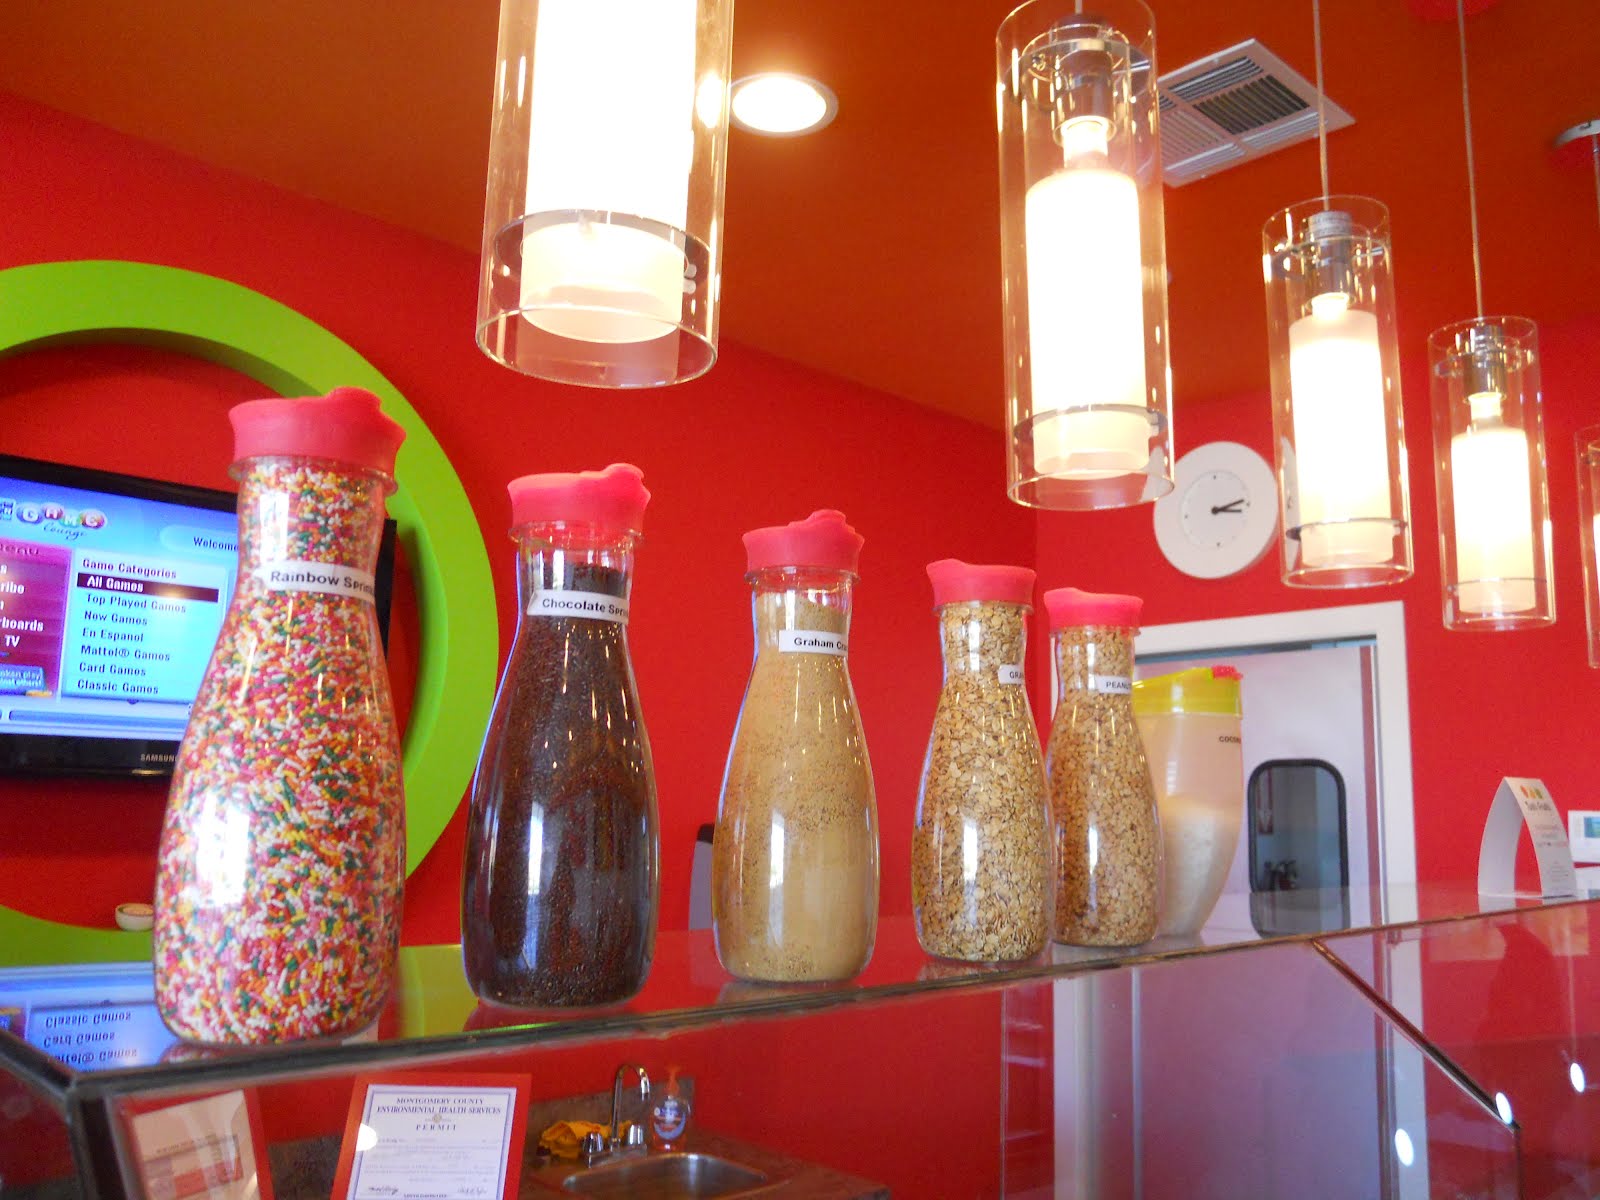
We continued on with where we went for lunch included things such as a napkin, a ketchup packet (she wanted Chic-Fil-A) and someone else's shoe! A stop at the frozen yogurt store had items such as sprinkles, a plastic spoon and her finished frozen yogurt creation!
It went on a on because we had QUITE the full schedule for our day but I successfully wore her out (and me too in the process) and she was SO thankful for our day together! It was so fun and it's so important to take those moments to set aside time, yes even whole days, to just devote to your son or daughter. Would you like to see a couple of her pictures?? hehe...okay.


(picture taken in Hobby Lobby)


(picture taken in Tutti Frutti)

Don't you just love how I modeled her plastic spoon for her??! The day was so fun - try it with your baby girl (or boy)!

Sunday, January 29, 2012

Valentine's Day Bulletin Board Idea

Here is a simple and cute bulletin board idea for the toddler classroom. The way it is shown here is by taking a coloring page of I think it's Tenderheart bear?? and having each child color their bear (pink for the girls and blue for the boys) Then I took ink stamp pads and put the kids thumbprints in the heart on the tummy and the pads on the paws and ears.


I used pink for the girls and purple for the boys.


Other alterations could include:


1. Printing out the kids faces and gluing them onto the Care Bear's face so it's literally YOUR students on the board!


2. If kids are older you can have them paint or decorate with something fuzzy like yarn or cornmeal or sugar (just dye the cornmeal or sugar to desired color).


3. If you have a small enough group print out all the different Care Bears (tenderheart, hugs and tugs, braveheart, grumpy, etc...) and each child can be THAT Care Bear!


Saturday, January 28, 2012

How to entertain a little boy...

In my class this week we were learning about Abraham and Sarah and their trip to Ur. I had planned on bringing suitcases and bags with common items you would pack for a trip. The kids were going to have to pack the bags! However one day it was dumping rain and we had tornado warnings and I got distracted by the bad weather and headed out the door without the suitcases. So when I got to school I had to think fast! My idea for the kids was to make a road out of masking tape and have car and trucks out for them to TRAVEL on the road with!


It was a HUGE hit! The boys especially loved taking the cars and zooming them down the road! It was an accident but I'm glad it happened. Now I only had about five minutes to make this one little road (as you can see in the photos) but you can get as creative as possible! Just tape a road onto a kids table or maybe make a whole map out of a cheap rug! The sky is the limit!


Here was my small version - and since it was such a hit I actually did it on most of the table the next day, excluding my little railroad track thing.


Tuesday, January 24, 2012

A good rest and a good read

Oh my sweet blog! How I've missed you so! However, as crazy as my fall and winter had gotten I really needed a true rest. I spent Christmas in Kansas with my entire family, then laid around and read as much as I possibly could on my Kindle and just finished spending three weeks with my parents visiting here! And I don't know what "parents visiting" means to you but to me it means that between my mom and I's cooking we eat GOOD food and a LOT of it, we get to go do something fun and magical cleaning fairies always appear while I'm away at work! Haha, it really was fun and I hated to see them go but it's time to get back to a regular schedule and hopefully some more regular blog posts! Wouldn't you say?!


I am working on a couple of posts for the future and one very good guest blog post which I think you will be highly interested in, however until then since I have been avidly reading during my break I decided to share with you what I've gotten myself into.


The Percy Jackson Series by Rick Riordan


I was leery of reading the series because yes it has all the Greek gods and goddesses and demigods etc. in it. However a friend in the faith whom I trust told me she read it to her older son and that she, and her boy, really enjoyed them and as long as it's to an older audience that knows this is FICTION then it does have some educational value along with a great storyline. With every god or creature it introduces it tells the history of it as per Greek Mythology. I have never known a lot about the subject so this easy reading series has been very intriguing to me. It has adoring characters and is written with humor and cliff-hanging suspense!


So I don't know what your thoughts are on the series but it has been some great reading and awesome entertainment to me for a few weeks now. I only have one book left!

Sunday, December 4, 2011

Holiday stress-buster: Spread the Love Challenge


Over Thanksgiving I finally had time to catch up on all the magazines that have been staring at me begging me to flip through them! One of them was my Better Home and Gardens magazine and I loved this article in the back of the December issue that was called "Peace Offering". It was about tricks we can easily do that naturally fight stress and those bad free radicals it releases! The number one item was to "do a good deed daily." Here's what it said under it:


"Researchers have long known that altruism - such as volunteering at a hospital - raises levels of dopamine, a feel-good brain chemical that shields the body from stress hormones. What's interesting is that no selfless act is too small, says clinical therapist Serena Wadhwa, Psy.D., director of the TriQual Living Center in Chicago. To sustain a helper's high, aim to perform a simple act of kindness every day. Easy examples include bringing the mail to an elderly neighbor, surprising a coworker with a cup of coffee, or slowing your car on a busy street to let another driver turn. Optional: Singing "Joy to the World" as you do it."


So I have decided that I'm going to do just that. Not only do I have stress wrapping up Christmas Parties at school (my students and both my own kids) and finishing my final paper for my college class along with just the regular Christmas shopping, wrapping and mailing etc, but showing love is our mandate as Christians and we should be doing this daily anyways!


So for this entire month, yes even the few days AFTER Christmas I commit to do at least one good deed daily and I will post them all on here to help give others ideas. I challenge you to pray about doing the same, it's never too late to start.


Here is what I've done so far:


December 1st: Curled my daughter's hair. That may seem ridiculous but it was her Christmas Program and I asked her how she wanted her hair and she wanted it all curly and done up. So even though I was running VERY late to be there early for our staff photo I accepted being late and made sure her hair looked gorgeous! She was so excited and proud!


December 2nd: Made a Jingle Bell Necklace for my son. His school has the 12 days of Christmas and so every day of school in the month of December has a different theme to dress as. It was "wear a jingle bell" day and we have long lost all the necklaces and other jingle bell items so I found a lose jingle bell and put a string through the top and tied it off so he had a jingle bell to wear. Oh and to double up I cleaned his room up and gave him a freebie for the day :)


December 3rd: Complimented a girl's outfit. It said no deed is too small! My husband and I went on a double date with two of our old teenagers so yes I still call her a "girl" and she was looking all cute so I made sure I really complimented her and made her feel good!


December 4th: I bought Dr. Pepper BBQ Sauce for a bridal shower! This one is bizarre and let me assure you I had a bag full of other good things for the bride-to-be, however this BBQ sauce was actually on the registry which we later found out was because the groom had the registry gun!! I know the guys always feel sort of left out when it comes to wedding gifts so I bought him the BBQ sauce to make his day!

Thursday, November 24, 2011

T.T.A.R. Day 3

Obviously I spent my day having fun with friends and stuffing my face which is why this post is minutes from the midnight hour. And since Thanksgiving is over and you no longer need recipes for that wonderful occasion that our digestive system is so dearly paying for now I want to share on of my favorite comfort Christmas treats! It involves the following two things:


Peppermint Ice Cream Hot Cocoa


And it's just that. You make your favorite blend of hot chocolate. I adore creaminess so I have always made mine with milk but I'm sure if you are happy with your water kind that it will work just the same. Next plop in a scoop of peppermint ice cream and enjoy the creamy peppermint flavor it brings! I always eat some of my ice-cream before it all melts! The hot and cold with the peppermint flavor is divine! And it's my favorite winter curl up on the couch treat! So after what I'm sure was a whirlwind of a day and possibly lots of fun yet stressful times with familia in your house (or travelling to theirs) you deserve to sit your butt down in your favorite spot and kick your feet up. While you're at it, sip on this hot drink - it just makes it that much better!


THANKFUL THOUGHT:

Okay so I really thought all of these would be from my kids but of course as soon as I WANTED my kids to be funny - they stopped being funny! Well that's not all true. They said some hilarious things today such as when my son and daughter started playing chase at our friends and my husband told them not to run in the house - my daughter quickly and politely asked, "May I walk really fast then dad?" However that has nothing to do with thankfulness so I will simply join in the spirit of the day (since it will be over in 6 minutes) and say that I am extremely thankful for a loving husband that absolutely adores me, beautiful healthy children that are respectful and love God, and for good friends, the kind that truly care, that we could spend a wonderful day with! Love and hugs to my family scattered all over the US today - love you bunches! And to my blog family - ENJOY your family and the holidays you have with them!

Wednesday, November 23, 2011

T.T.A.R. Day 2

Do you see that delicious chunky sweet yummy-ness to the right in the picture above?? That would be the feature of today's recipe and one that I will be making in T-minus 1 hour. It is a Chunky Pear-Apple Sauce and I found it from a random cookbook from the library a couple years ago. Here is the description straight from the cookbook:


"During autumn holidays, the aromas of slow-cooking fruit and sugar evoke a real feeling of nostalgia. At Thanksgiving I make a point of serving a crisp-tasting apple compote, and with the addition of succulent, fragrant pears, I find that the smooth flavor combination marries well with the savory herbs and spices used in the stuffing, gravy, and-of course-the turkey."


CHUNKY PEAR APPLE SAUCE

6 Anjou or Comice pears, slightly under ripe


4 apples (preferably a mixture of Granny Smith, McIntosh, and Golden Delicious)


2 TBLS Fresh Lemon Juice, or more to taste


1 C. Apple Juice


1/2 C. Sugar, or more to taste


1 tsp. Finely Grated Lemon Zest


1. Core, peel, and cut the pears and apples into large chunks. Toss them with the 2 TBLS lemon juice in a large heavy pot.


2. Add the apple juice, 1/2 C. sugar, and the lemon zest. Stir and bring to a boil over high heat. Reduce the heat to medium-low and simmer, partially covered, until the fruit is tender but not mushy, about 15 minutes.


3. Uncover the pot, stir, and continue cooking to thicken the juices, 5 minutes more. Taste and add more sugar or lemon juice if desired, stirring carefully so as not to break up the fruit too much. Remove from the heat and allow to cool to room temperature. Then transfer to a container, cover, and refrigerate for as long as 4 days. Bring to room temperature before serving.


Makes 8 cups


Thankful Thought:


Last night at dinner I asked my daughter what was something she was thankful for? My comedian of a husband pipes in before she answers, "I'm thankful I'm not a turkey!" Of course my daughter amused by this (although she probably has no idea why it's funny), then answers, "I'm thankful I'm not a dog!" Of course I follow up with why? And after a moment of thought she says, "No, actually I've always wanted to be a dog."


Oh my children, my children. (Smile)


Until tomorrow...


be thankful and make sure your turkey is defrosted!

Tuesday, November 22, 2011

Top Ten Tuesday


Oh and just because it's been so long since I've linked up - I decided to post a Top Ten Tuesday thanks to inspiration from Diaper Diaries! OK my top ten are the things I want to get done over my Thanksgiving holiday:


1. Bake, decorate and of course EAT holiday sugar cookies with my kids!

2. Go on a family hike and have a picnic lunch.

3. Finish the painting I'm doing for my daughter's bedroom.

4. Complete all my homework (unfortunately).

5. Bake the most delicious chunky pear-applesauce and pumpkin pie EVER to take to our friend's that are hosting a Thanksgiving Feast!

6. Blog every day this week.

7. Enjoy some TV shows and movies with my hubby - and I was DEVASTATED to find out that this week there was no showing of "Once Upon a Time" which has become one of our favorites!

8. Make sure I'm prepared for my lesson on Monday because my boss is observing me!!

9. Get out and set up ALL my Christmas decorations!!

10. My favorite - enjoy as much hot cocoa with peppermint ice-cream as I possibly can!!


Want to participate?? Just click on the Top Ten Tuesday logo at the top of this page!

T.T.A.R.


Do you like my acronym? It stands for a Thankful Thought And a Recipe! I am actually home all week and have been enjoying my time off like no body's business!! In other words I am loving this break! In my new found free time (short lived as it may be) I have been inspired for some blog posts. My first is to share a few of my tried and true Thanksgiving recipes and to also insert a thankful thought. However these aren't the mushy gushy thanks that you may be used to seeing on blogs and Facebook this time of year. Hopefully they will all come from my kids. And you all know that no one ever knows what will come out of their mouth!


So to start off I have an alternative dessert recipe, aside from the traditional Pumpkin Pie (which even when I make this recipe I STILL must make a pumpkin pie too!), and most have heard of it: Pumpkin Roll. It's goodness is incomparable! It's sugary, cream cheesy goodness! And it really is quite simple, it's just time consuming. But the great part is that you can easily make it a day ahead because it has to chill in the fridge before serving anyways.


PUMPKIN ROLL


2/3 C. Pumpkin (100% pumpkin)

3 eggs

1 C. Sugar

3/4 C. Flour

1 tsp. Baking Soda

1/2 tsp. Cinnamon


FILLING:

8 oz Cream Cheese

1 tsp. Vanilla

1 Tbsp. Butter

1 C. Sugar


Mix all ingredients. Cover a 9 x 13 pan with wax paper (covering entire bottom and sides of pan) and spray paper w/ Pam cooking spray until covered. Pour dough onto wax paper. Bake for 17 minutes @ 375 degrees. Take it out and with a damp tea towel flip it over. Let cool for about 10 minutes then remove wax paper and roll the bread up with the towel. Cool for 4 hours. Once cool mix up first 3 ingredients of filling. Once thoroughly mixed, add sugar. Unroll the bread and remove the towel. Spread the filling on top (leave about an inch from the end because as you roll, it will push the icing). Roll it back up with the icing now. Cover and refrigerate for 1 hour before serving. When ready to serve, cut into slices about an inch thick.


TOTAL TIME: 6 hours SERVES: About 12


I would have had a picture because I just made one this past week when we had some friends over for a game night, however we devoured it quite quickly and my photo thought was a little late, sorry :(


Now for the thankful thought: This morning my son was digging through his backpack and found his pen pal letter. They do pen pals within the school and he recently received a new letter. We were reading it to him and at the end of the letter his pen pal told what he was thankful for and then asked my son what HE was thankful for. My son, without missing a beat, replied, "I'm thankful for hunting for prairie dogs." And after a response of laughter we calmed down and asked him why to which his reply was, "Cause it's fun! And I get to collect bullets." Don't worry he means the bullet shells. I just found that hilarious and thought I would share. Until tomorrow...


Stay calm and ENJOY the holidays!

Sunday, November 20, 2011

Silent Sundays


I snapped a quick photo of this beautiful bloom at a friend's house a couple months ago. These photos weren't even digitally altered!! (Yes I'm bragging...but just because it doesn't happen often! I mean photos not needing editing, not the bragging, lol)


Saturday, November 19, 2011

Travelling?? Have kids in tow??

If you will be travelling for the Thanksgiving holidays and have some little tykes to entertain I found a perfect, affordable and creative item that is a must have for your to-go bag! I first discovered Crayola's Dry Erase Crayons at my son & daughter's doctor's office. They had a huge white dry erase board and when my kids picked up crayons and asked if they could please draw I quickly told them they couldn't use crayons on a dry erase board and I wasn't sure how the crayons ended up there.

From the receptionist's desk she kindly informed me they are new dry erase crayons and it was just fine for the kids to use! I was amazed and as a teacher of toddlers had to check this out! Sure enough - they are crayons that easily write on and wipe off of dry erase boards!

I dashed to the grocery store (yes they were at my local Kroger's store) and was even more surprised by finding a travel set of these awesome new crayons! I fought impulsiveness and just bought the crayons for me to try for now (which I have LOVED) but plan on buying one or two for my niece and nephew's - especially since my brother and his family will be moving in the spring!

So if you need something new and exciting to keep your kids attention and perhaps keep their noise level down for a bit - head on over to your local Wal-Mart, Kroger's or just click here to shop from Crayola.com!

Sunday, November 13, 2011

Thanksgiving Placemat Craft

It is a tradition at our Day School for every class to make place mats for the school wide Thanksgiving Feast! I've seen tons of versions of turkeys and even the Mayflower and I just HAD to come up with something different. Leave it to me to rock the boat huh? What started out with an idea to paint USING Indian Corn (place in paint, then roll on paper to make a border) changed into thumbprint Indian Corn in itself. All because my local grocery store threw out all the Indian corn the night before I went to buy some for our art project. Of course right?!

But I'm happy with how they turned out! We used paint craft rollers to instead make the borders with and then made lots and lots of thumbprints using yellow, red and brown paint to fill in a light pencil shape of corn I had made beforehand. I added the dark brown outline and the husks coming off the bottom of them and just printed out a poem I had my husband help me with:


With my cute little hands,

this corn I have made.

Like the Indians prepared,

on Thanksgiving Day!


It is super easy and would be a fun craft project for you and your little one to do next week when they're home from school! Not to mention it will save some cleaning up after your Thanksgiving meal!

Thursday, November 10, 2011

Have you ever had one of the mornings?


Have you ever had one of those mornings? Or perhaps one of those days? Today was certainly one of "those" kind of mornings and I was at my whit's end! Kids were driving me nuts, I had completely forgotten to get something I needed for my class THAT DAY so I'm frantically trying to run out the door early enough to get to the store before dropping kids off at school (which typically I'm lucky to barely get just to the school on time) and we get to the store, wait FOREVER while some guy goes in the back to see if they have any to find out the item I needed had all been thrown out the NIGHT BEFORE... yada yada yada. You get the gist right? So when I finally have dropped one child off and we're headed to the next drop off I'm praying to God pleading with Him to PLEASE help me because I just cannot have a whole day like this! I need my day to get better!


Right then as I'm driving and asking God to PLEASE have mercy and bring me some peace some flashing lights out of the corner of my eye catch my attention. And NO it wasn't a cop okay! I looked over and it was an ambulance that you can tell had just pulled up to this person's house. And my first reaction was "Oh Lord I hope everything is okay!" I mean obviously it's not okay at the moment, thus the ambulance, but I was just hoping it would turn out all right. After whispering a short prayer my mind finally realized something:


My morning really wasn't that bad after all.


When you put your circumstances into perspective things really aren't as bad as they seem in that moment. I thanked God for helping me remember to count my blessings and my "problems" really weren't a big deal.

Sunday, October 23, 2011

Fall Bulletin Board Idea

I love coming up with my bulletin boards in my classroom each month and thought I would post my October board. A simple yet cute bulletin board idea for your classroom!


"LET'S HAVE A BALL AS WE ENTER FALL!!"

Saturday, October 22, 2011

Chocolate Pudding Art

For the beginning of October I'm having my students create a huge "Chocolate Pudding Pumpkin Patch" in our classroom! But I had never done the first and most important part of this art before, the chocolate pudding part! So I did mini versions at home with my own kids to have them test it out! They were all for it of course!

So first off you simply make chocolate pudding. My recipe called for 3 cups of milk but I'm not about to waste that much milk on something I'm not eating so I made it with 2 cups of water and 1 cup of milk so it would at least keep it's creamy texture. Once it's made you simply slop a little on some paper (I recommend card stock so your paper won't rip to pieces with the moisture). Then swirl around! I had a basting brush that has individual plastic strands that we used and it created beautiful swishes and swirls! However for my toddlers I had little plastic cars that are easy to clean that they drove through the pudding! And of course you always had a couple of them that were far more interested in painting with their hands so they could then lick the remains off! This is the beauty of this art project - it's safe if your baby attempts to eat the paint!


Here was my daughter's painting. The first one, pictures above, was my son's.


And this was mine! Took about 5 seconds to make. Now if they're older and you are trying to make a more "accurate" pumpkin patch have them make straight lines of rows like a real field would be.


Next, since again this was a smaller version I found some print-outs online of scarecrows and pumpkins. My children picked which scarecrow they wanted and then they colored away! I also had them cut all of them out and glue them on their chocolate pudding (once it was dry). And their chocolate pudding pumpkin patch was complete:

My daughter's.


My son's.


My son wanted his taken in the window too :)


Now at my school each day was a different art project to add to our creation. First we did chocolate pudding art on a big sheet of bulletin board paper. The next day we sponge painted pumpkins. I used big star burst sponge brushes but any kind of sponge or other paint option will do!


Next came our scarecrows. I found a cute scarecrow and had each child water paint them. I was going to try to have them "water paint" with ice cubes but couldn't get the ice cubes made on time this year. Maybe next year.


Then just to make it look nicer I matted the kids pumpkins with some green paper. And then stick them all on your dry chocolate pudding!


For one and two year old kids - this was a BLAST! And they love it hanging in our room because they can point at them all day and you can go over and reiterate the names of each thing and the colors. As for my own kids smaller versions I'm probably hanging them on their bulletin boards or perhaps sending them to the grandparents as a "Happy Fall" picture!


Either way or on either scale it's SO fun and your kids freak out a little when you hand them chocolate pudding to PAINT with!

Monday, October 17, 2011

A craft for the season - WHOO WHOO!

In case you couldn't tell by my lack of posts I'm working full-time now as a Day School Teacher of 1-2 year-olds. Yes insanity at it's best!! However I've had so much fun finding cute crafts for these little ones to do and the best part is that almost all of them can be altered to fit older kids too. Such as this owl craft.

For my little students I cut out the parts and they just glued them on. However for older kids, such as my own kiddos, I had them cut out their own pieces.

Here's what you'll need:
- Brown Paper Bag
- Brown Construction Paper
- White Construction Paper
- Orange Construction Paper
- Black Sharpie Marker (or regular black marker if older kids are doing it themselves)
- Scrap paper or old magazine
- Brown String
- Tacky Glue (or regular Elmer's but tacky seems to hold better)

And here's what to do:
1. Cut out a brown triangle that fits from one corner of the bottom of the bag to the other corner and the point goes down to the crease in the bag. (bag is still flat at this point, don't open yet). Glue on as the beak.
2. Cut out two white circles and glue on each side of beak.
3. With marker make a circle in the middle of the eye and then lines coming out from circle to edge of white circle.
4. Also with marker make V's all over bottom 2/3 of bag to make the owl's feathers.
5. Cut out two orange feet and glue on facing up the bag. once dry fold the bottom part down so they stick out like feet. You'll glue them on about 2/3 a way down the bag.
6. Wait for all glue to dry.
7. Open bag and using scrap paper or pages of old magazine have kids crumple up paper into balls and stuff bag a little more than 2/3 full.
8. Once nice and stuffed, gather the bottom of the bag and tie tightly with string. Bend up and towards the back to make a little owl tail.
(sometimes you have to work the bottom of the bag a bit to get it somewhat flat and the feet right once stuffed.) Oh and the one on the right was a trial owl - we learned that using yellow makes it look "duck-like" so I recommend the brown and orange :)

And voila! WHOO -WHOO -WHHHOOOOO!

A seasonal craft for you and your little one to enjoy!

Sunday, October 16, 2011

Silent Sunday

My crazy idea and my dad's photographic talent! Here are some FUN photos we took at White Sands this summer! (these are the ones I promised I would post)

Saturday, September 10, 2011

So many great ideas...

I have been rolling through my Twitter roll the last couple days and have come across SO many great ideas from my fellow bloggers that I finally decided I just needed to share some of them on here for you to enjoy too!


The first is a re-purposing idea for organization from Beechem Bright Spots blog


(Picture from Beechem Bright Spots blog)

Second are some VERY thought provoking questions about the book of Ecclesiastes from Rachel Olson's blog (she is from Proverbs 31 Ministries).


Next up (and one I will be trying TODAY) is Homemade French Vanilla Coffee Creamer from Mrs. Happy Homemaker. And oh while you are there check out her Prosciutto Egg Cups Recipe! It looks SO yummy!


And this last thing isn't an idea but a reminder: If you are participating in Beth Moore's Living Proof Ministries Siesta Scripture Team then it's officially time to sign up for the 2012 Celebration Event!! Here's the link: CLICK HERE

That's all for now! Have a wonderful Saturday :)

Monday, September 5, 2011

Cute laterns for any occasion!

About a month ago I found this cute craft idea in a magazine. It was for the 4th of July and had the cutest star patterns on them but since I found it AFTER the 4th of July...I let my kids just have at them!

Start by filling two aluminum cans almost full of water and put them in the freezer (remember to remove any paper before doing this).

Next pick any pattern you like, or in my case just freehand it, since this was a quick project to keep the kids busy for a bit anyways! Take a nail and a hammer and nail holes to make your pattern in the can. The ice keeps the can from denting or folding under the pressure.


I highly recommend holding this freezing cold can between your bare feet. It felt fabulous! (Just in case you didn't pick up on the sarcasm in that...note now that I was being saracastic and please do not follow my example)


Once you are done nailing your pattern leave out in the hot sun until all the ice melts. You may need to hammer the bottom back in if it popped out due to the freezing.


Once all the ice is gone dry it very well! On the outside! Do NOT stick your hand in the can - the nail holes are extremely sharp! My husband found this out the hard way when I was busy and asked him to please dry the cans.

Next get out some paint and have at it! Again if you want a 4th of July do red, white or blue with star patterns or fireworks perhaps. For fall time or Halloween do a pumpkin shape with orange and black paint...you get the idea.


But remember this was a project for me to keep the kids busy and entertained so they just went at it with all kinds of colors!

Obviously this was my boy's.


And this was my girl's. Isn't it funny how they naturally pick those types of colors??


Then when the paint is dry, place them on an outdoor table or by a fun family game inviting guests to play by a soft warm glow!