Ever since we have moved here our church, Lone Star Cowboy Church, has put on an annual Fall Festival right around Halloween time to give families a fun, safe and FREE event to celebrate the fall season! They always have done it on Friday nights and this year Friday night was also Halloween night so they added a trunk or treat and continued on as planned.
I had an idea of what to dress my kids up as since Tyler has a "handy man" hard hat, tool belt (with all the tools included) and neon orange vest AND I had Tyler's old costumes I thought I would just put on Gracie now. However about two weeks before Halloween I thought to myself, "my son growls at everyone who says hi to him, and he has a CRAZE for dinosaurs right now so what better excuse to finally LET him growl and not get in trouble for it!" And so the costume making began. I went the homemade (and cheaper) route and hand made both of my kids costumes. We paper mached the dinosaur head, dyed a couple pillow cases green and made a body and tail and added painted paper mached spikes down the back and voila! DINO costume! I also found some bunny ears laying around (surprisingly from when my husband rode bulls...he put them on over his helmet one time on Easter) and so cut up and sewed another pillow case and hot-glued some cotton balls together and costume number 2 - a bunny! I had a BLAST making them and let the kids help as much as they could. Although after about 5 minutes of slinging liquid starch all over the newspaper covered (thank goodness) table and mom trying to reign them back a little they had had enough. Anyways I DID get some snapshots of making the costumes and as soon as we get them off my husband's cell phone (sorry a camera wasn't handy at the time) I will do a step by step post of making your own costume. In the meantime here are some pictures of our fabulous fun filled night!
My Two Cuties:

The backs of them were more detailed than the front so we had to get the rear shot! I love their tails, hehe. Oh and the dino spiked DID go all the way up but of course before I could even get a camera out Tyler had already ripped one off. The rest didn't come off however - they are SUPER GLUED on!


They had a whole row of people from our church that set up for Trunk or Treat. My kids ask for candy for their first time (since we usually just do the festival). Tyler was nervous at first but once he realized he got candy from these people got pretty brave and started walking up by himself! Go figure.

My camera is slow but Tyler is throwing a bean bag through the hole to get a prize. He won a helicopter toy. Those sticks with two propellers that if you rub your hands together fast while holding the stick they will take off. I know you know what I am talking about.

They had so many games to play that for the first time we actually didn't get to play all of them. Every year it outdoes itself and gets bigger and bigger. It truly is like a small carnival! they had a dunk tank, 4 different types of blow up play stations, such as jump houses, slides, obstacle course, and even a crawl through caterpillar. Every time you won a game you got a prize which was either a small toy or candy. There was face painting, cake walks, door prizes, free hot dogs, popcorn, cotton candy (OK enough with the free food...), horse and pony rides, a petting zoo, etc... the list just goes on and on and on.


Gracie's first cotton candy she LOVED it! Tyler on the other hand handed it to me and said "there is hair on this", meaning the cotton candy itself. I could NOT convince him to try a bite.

Ah yes and who could forget the traditional "Pastor's Greased Pig Contest"? Every year they make, yes I said MAKE, all the pastors get in the ring and do a greased pig contest. It is overly competitive guys that all love to pull pranks - bad combination! I am proud though this is the first year Nick has NOT broken a bone during this event. The first year he broke his glasses and chipped a tooth and the second year he broke a finger. These pastors collide, tackle, trip, roll, and do just about everything but catch a little pig! Pastor Randy our senior pastor was the winner of the 2008 Pastor's Greased Pig Contest. This is him and my husband in the picture below (Randy is on the ground).

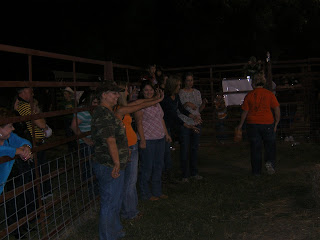
Right after the Pastor's greased pig they did a "Mommy Greased Pig" and since I was taking pictures of my hubby I was caught standing nearby. So here we are lined up getting our hands soaped (we can't do the traditional oiling of the pigs since staining clothes is a problem with such a crowd) and that is me in the orange shirt showing them I did NOT shake all of it off! My hands are NICE and soapy!
and this little piggy went in the hay bails...

My friend Dana grabbed me as we were making our way to our car for the night and asked if I still had my camera. Dumb question. But still she showed me these two pigs that were asleep on each other and she said they had been like that for almost 30 minutes now. Dana said it looked like a postcard picture so she wanted me to catch a shot. Well you don't have to ask me twice...

We had a blast and when I asked Tyler if he had fun simply responded, "yea let's do it again!"
I explained we had to wait one more year before it came again but promised we would do it all again, costumes, pumpkins, candy and all!
So what did you do Halloween night?


 NOTE: Do only about 4 layers of paper and then do a layer of white computer paper so it easier to paint later.
 Second component of the costume was the body. It was made out of a pillow case!
  2. Then cut arm holes and a hole for their head - make sure it isn't too big because it needs to rest on his shoulders to stay up.
  4. Once stuffed full sew up the end and then sew the entire tail onto back of pillowcase body.
 For some reason it cut the bottom of my picture off when I rotated it around so sorry you don't have the full picture!
 All DONE! After doing this I realized the possibilities are endless on costume ideas for animals. Probably monsters and anything else too for that matter. You could do a zebra - add ears to the mask, or a camel -add humps instead of spikes and shorten the tail etc... I made a bunny costume for my little girl, taking out the mask and purchasing bunny ears headband and by making a tail out of cotton balls and a hot glue gun.


 Posts
Posts


