Showing posts with label recipe. Show all posts

Wednesday, August 15, 2012

Cheesy Olive Bread

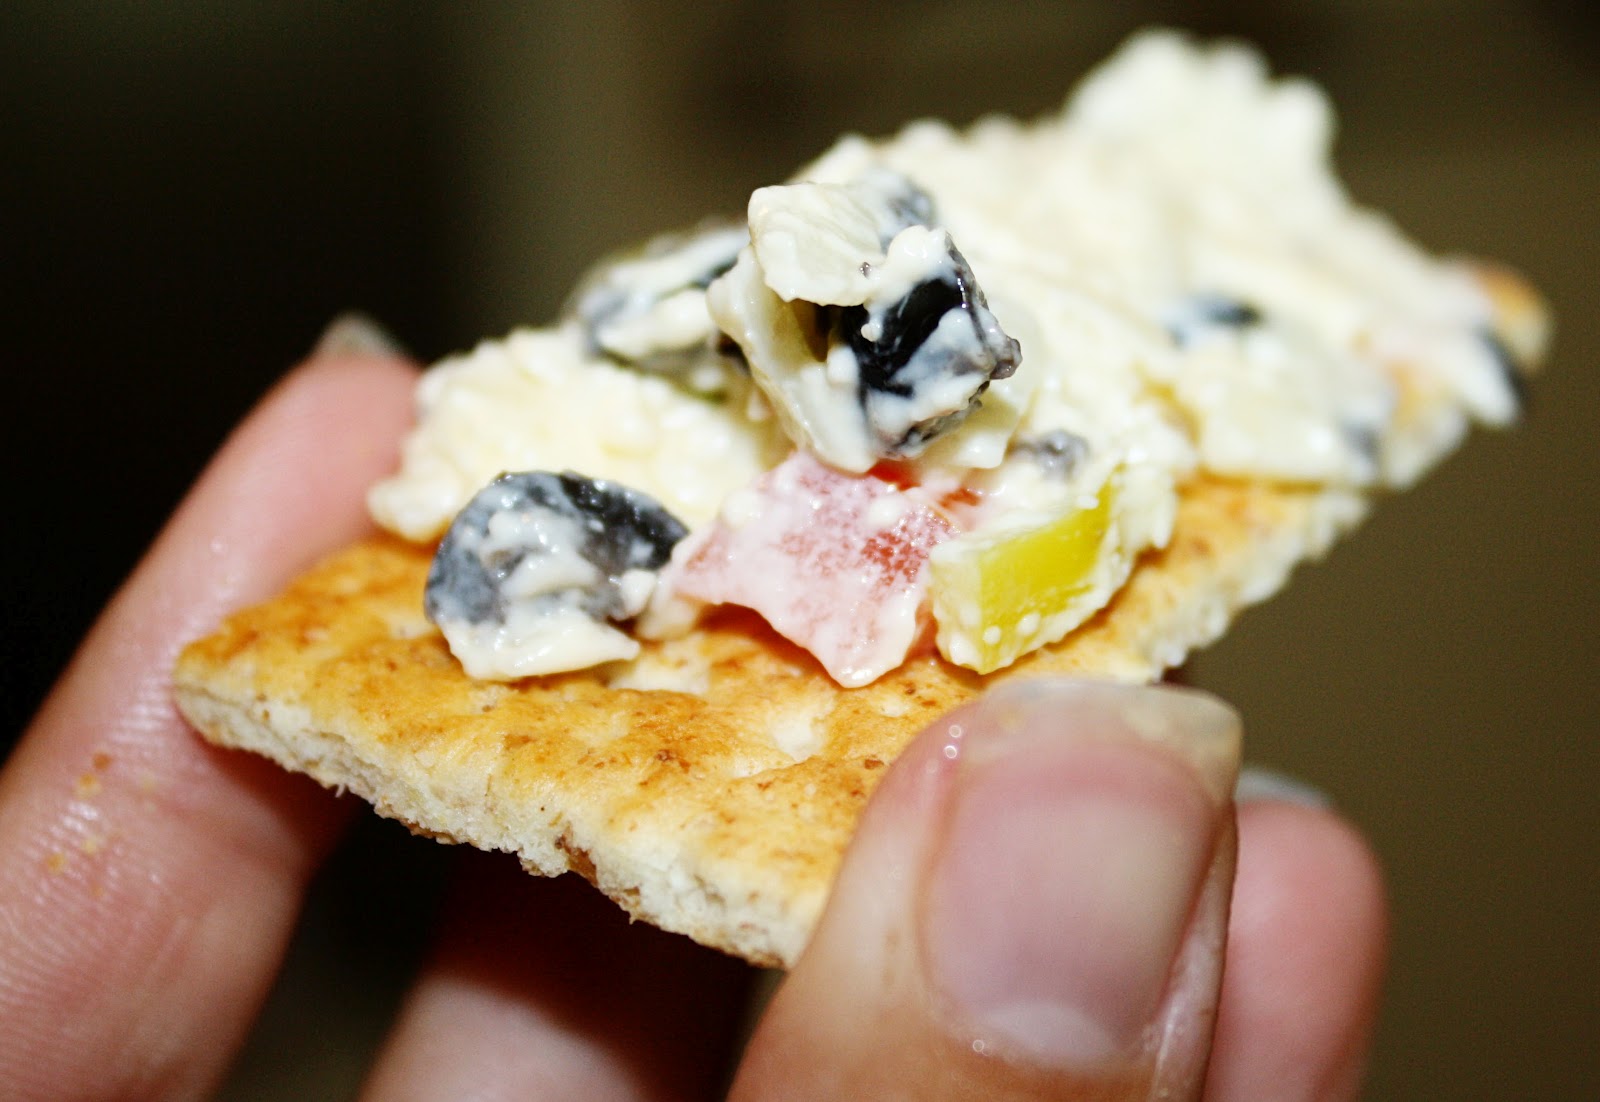
 So if you have ever read this blog before you already know I am a big Pioneer Woman fan! Just yesterday I made one of her pasta dishes and just to make the calories go way beyond control I made her Cheesy Olive Bread to go with it! (click link for recipe)
 However my husband is allergic to onions so I RARELY cook with them and I'm NOT a fan of green olives. They make me want to puke. I'm sorry for the visual but seriously, yuck. So if you are the same in either of those categories I HIGHLY recommend my substitutions! Instead of green onions I chopped up banana peppers and instead of green olives I went with good old tomatoes! The crunchy tangy one was substituted with a crunchy and tangy one and the moist one had a moist substitute so it turned out FANTASTIC!! I LOVED it!

Can you tell?? 

Oh and when you read Pioneer Woman's recipe in her cookbook she encourages you to try some of the mixture on a cracker first. Okay let me just say the next time I make this it will be piled in a bowl with crackers around it. Forget the bread!


I really did like it better as a cracker spread but that is not to take away from the bread and it's yummyness! 

Plus it's almost football season (as I am WELL aware since I'm married to the Fantasy Nut) so the more cheesy recipes the better! 

P.S. In case you are married to a similar Fantasy Football nut - you can refer them to my husband's very own blog: The PPR Guys. They will think you are a fantastic wife who cares so much! :)


Wednesday, April 18, 2012

Easter at our house

We could just stop after that photo couldn't we? I did it to be mean. You know good and well the recipe for that is coming at the end of this post but you also know it can't be that easy. You have to sit here and endure the long drawn out recap of our Easter weekend first.

Not really.

But I DO want to focus on the REAL importance and meaning of Easter first before getting to the food. We don't celebrate the Easter bunny at my house. We celebrate the real reason for Easter and the reason this holiday came to be - and that is the resurrection of our Lord Jesus Christ! If not for his sacrifice and conquering power over death we couldn't live with the hope and joy and peace that we do.

And since photos speak a million words - here's how I explain the "joy" part that God has given to me...


Family. That about sums up my joy. (smile and far off stare)
I saw one of the cutest pics today that someone had posted on Facebook where a guy and girl were kissing. The guy held a sign that said "I stole her heart". And the girl held a sign that said "So I stole his name." My husband informed me that it was so last year (or whenever) but I thought it was adorable! Anyways I'm getting sidetracked. Recipe. Food. Focus.
Okay so the wonderful dessert you saw pictured above was a total mistake! I had set out to make an angel food cake ROLL. And as you can tell it is NOT a roll but a layered cake. Since I had never made angel food cake and I have made TONS of pumpkin rolls I read through the directions quite quickly and plopped that dough into a 9x13 pan covered with parchment paper. Yes. Yes I did. Anyone who has ever made angel food cake before is gasping right here saying "No she didn't!" But I did. And in case you are the innocent out there who, like me, has never worked with angel food cake, it rises. No that doesn't even begin to explain what it does. It TRIPLES in size!!
So after glancing in my oven and seeing this phenomenon take place I knew instantly I needed a back up plan. When it came out it was SO thick and HIGH that I made an easy decision. Slice this sucker in half and make it a cake!
So there is the first step to my dessert. Bake an angel food cake in a 9x13 pan covered in parchment paper. When it comes out flip it over onto cooling rack. Once cool slice it in half. If at this step you're not sure what direction you cut the cake in half then please refer to the photo and figure it out. If you still can't figure it out, put the knife down slowly and walk away from the kitchen!
On the top of the bottom layer spread a thing coat of strawberry ice cream topping. Next, mix 8 oz cream cheese and 2 cups of Light Cool Whip in a bowl until well mixed. Spread this cool whip mixture on top of ice cream topping. Place the top layer back on and then cover the whole cake in whipped cream! And that's it!
Note: It is easier to cut through and eat after it's been refrigerated a day. Just a thought!

Thursday, November 24, 2011

T.T.A.R. Day 3

Obviously I spent my day having fun with friends and stuffing my face which is why this post is minutes from the midnight hour. And since Thanksgiving is over and you no longer need recipes for that wonderful occasion that our digestive system is so dearly paying for now I want to share on of my favorite comfort Christmas treats! It involves the following two things:


Peppermint Ice Cream Hot Cocoa


And it's just that. You make your favorite blend of hot chocolate. I adore creaminess so I have always made mine with milk but I'm sure if you are happy with your water kind that it will work just the same. Next plop in a scoop of peppermint ice cream and enjoy the creamy peppermint flavor it brings! I always eat some of my ice-cream before it all melts! The hot and cold with the peppermint flavor is divine! And it's my favorite winter curl up on the couch treat! So after what I'm sure was a whirlwind of a day and possibly lots of fun yet stressful times with familia in your house (or travelling to theirs) you deserve to sit your butt down in your favorite spot and kick your feet up. While you're at it, sip on this hot drink - it just makes it that much better!


THANKFUL THOUGHT:

Okay so I really thought all of these would be from my kids but of course as soon as I WANTED my kids to be funny - they stopped being funny! Well that's not all true. They said some hilarious things today such as when my son and daughter started playing chase at our friends and my husband told them not to run in the house - my daughter quickly and politely asked, "May I walk really fast then dad?" However that has nothing to do with thankfulness so I will simply join in the spirit of the day (since it will be over in 6 minutes) and say that I am extremely thankful for a loving husband that absolutely adores me, beautiful healthy children that are respectful and love God, and for good friends, the kind that truly care, that we could spend a wonderful day with! Love and hugs to my family scattered all over the US today - love you bunches! And to my blog family - ENJOY your family and the holidays you have with them!

Wednesday, November 23, 2011

T.T.A.R. Day 2

Do you see that delicious chunky sweet yummy-ness to the right in the picture above?? That would be the feature of today's recipe and one that I will be making in T-minus 1 hour. It is a Chunky Pear-Apple Sauce and I found it from a random cookbook from the library a couple years ago. Here is the description straight from the cookbook:


"During autumn holidays, the aromas of slow-cooking fruit and sugar evoke a real feeling of nostalgia. At Thanksgiving I make a point of serving a crisp-tasting apple compote, and with the addition of succulent, fragrant pears, I find that the smooth flavor combination marries well with the savory herbs and spices used in the stuffing, gravy, and-of course-the turkey."


CHUNKY PEAR APPLE SAUCE

6 Anjou or Comice pears, slightly under ripe


4 apples (preferably a mixture of Granny Smith, McIntosh, and Golden Delicious)


2 TBLS Fresh Lemon Juice, or more to taste


1 C. Apple Juice


1/2 C. Sugar, or more to taste


1 tsp. Finely Grated Lemon Zest


1. Core, peel, and cut the pears and apples into large chunks. Toss them with the 2 TBLS lemon juice in a large heavy pot.


2. Add the apple juice, 1/2 C. sugar, and the lemon zest. Stir and bring to a boil over high heat. Reduce the heat to medium-low and simmer, partially covered, until the fruit is tender but not mushy, about 15 minutes.


3. Uncover the pot, stir, and continue cooking to thicken the juices, 5 minutes more. Taste and add more sugar or lemon juice if desired, stirring carefully so as not to break up the fruit too much. Remove from the heat and allow to cool to room temperature. Then transfer to a container, cover, and refrigerate for as long as 4 days. Bring to room temperature before serving.


Makes 8 cups


Thankful Thought:


Last night at dinner I asked my daughter what was something she was thankful for? My comedian of a husband pipes in before she answers, "I'm thankful I'm not a turkey!" Of course my daughter amused by this (although she probably has no idea why it's funny), then answers, "I'm thankful I'm not a dog!" Of course I follow up with why? And after a moment of thought she says, "No, actually I've always wanted to be a dog."


Oh my children, my children. (Smile)


Until tomorrow...


be thankful and make sure your turkey is defrosted!

Tuesday, November 22, 2011

T.T.A.R.


Do you like my acronym? It stands for a Thankful Thought And a Recipe! I am actually home all week and have been enjoying my time off like no body's business!! In other words I am loving this break! In my new found free time (short lived as it may be) I have been inspired for some blog posts. My first is to share a few of my tried and true Thanksgiving recipes and to also insert a thankful thought. However these aren't the mushy gushy thanks that you may be used to seeing on blogs and Facebook this time of year. Hopefully they will all come from my kids. And you all know that no one ever knows what will come out of their mouth!


So to start off I have an alternative dessert recipe, aside from the traditional Pumpkin Pie (which even when I make this recipe I STILL must make a pumpkin pie too!), and most have heard of it: Pumpkin Roll. It's goodness is incomparable! It's sugary, cream cheesy goodness! And it really is quite simple, it's just time consuming. But the great part is that you can easily make it a day ahead because it has to chill in the fridge before serving anyways.


PUMPKIN ROLL


2/3 C. Pumpkin (100% pumpkin)

3 eggs

1 C. Sugar

3/4 C. Flour

1 tsp. Baking Soda

1/2 tsp. Cinnamon


FILLING:

8 oz Cream Cheese

1 tsp. Vanilla

1 Tbsp. Butter

1 C. Sugar


Mix all ingredients. Cover a 9 x 13 pan with wax paper (covering entire bottom and sides of pan) and spray paper w/ Pam cooking spray until covered. Pour dough onto wax paper. Bake for 17 minutes @ 375 degrees. Take it out and with a damp tea towel flip it over. Let cool for about 10 minutes then remove wax paper and roll the bread up with the towel. Cool for 4 hours. Once cool mix up first 3 ingredients of filling. Once thoroughly mixed, add sugar. Unroll the bread and remove the towel. Spread the filling on top (leave about an inch from the end because as you roll, it will push the icing). Roll it back up with the icing now. Cover and refrigerate for 1 hour before serving. When ready to serve, cut into slices about an inch thick.


TOTAL TIME: 6 hours SERVES: About 12


I would have had a picture because I just made one this past week when we had some friends over for a game night, however we devoured it quite quickly and my photo thought was a little late, sorry :(


Now for the thankful thought: This morning my son was digging through his backpack and found his pen pal letter. They do pen pals within the school and he recently received a new letter. We were reading it to him and at the end of the letter his pen pal told what he was thankful for and then asked my son what HE was thankful for. My son, without missing a beat, replied, "I'm thankful for hunting for prairie dogs." And after a response of laughter we calmed down and asked him why to which his reply was, "Cause it's fun! And I get to collect bullets." Don't worry he means the bullet shells. I just found that hilarious and thought I would share. Until tomorrow...


Stay calm and ENJOY the holidays!

Saturday, September 10, 2011

So many great ideas...

I have been rolling through my Twitter roll the last couple days and have come across SO many great ideas from my fellow bloggers that I finally decided I just needed to share some of them on here for you to enjoy too!


The first is a re-purposing idea for organization from Beechem Bright Spots blog


(Picture from Beechem Bright Spots blog)

Second are some VERY thought provoking questions about the book of Ecclesiastes from Rachel Olson's blog (she is from Proverbs 31 Ministries).


Next up (and one I will be trying TODAY) is Homemade French Vanilla Coffee Creamer from Mrs. Happy Homemaker. And oh while you are there check out her Prosciutto Egg Cups Recipe! It looks SO yummy!


And this last thing isn't an idea but a reminder: If you are participating in Beth Moore's Living Proof Ministries Siesta Scripture Team then it's officially time to sign up for the 2012 Celebration Event!! Here's the link: CLICK HERE

That's all for now! Have a wonderful Saturday :)

Monday, June 13, 2011

Dangerous Chocolate Cake In a Cup

(to buy this Pride & Prejudice Mug click on picture)


Last weekend I had one of our teens staying with us and this young girl is a romantic. When I first found this out I told her I had a movie she HAD to watch - Pride and Prejudice. So she had come over for a sleepover and we watched Pride & Prejudice and I taught her how to make Chocolate Cake in a Cup - which needless to say she is a die-hard fan of both now and that's what she requests every time she comes over to my house! Since she was just here and we once again made the yummy desserts and watched our chick flick I thought I would share this quick simple recipe with you!


Oh and why is it called dangerous? Because you can make a chocolate cake in FIVE minutes!! That IS dangerous!


CHOCOLATE CAKE IN A CUP

1 large coffee mug (the bigger the better)
4 TBSP Cake Flour (plain, not self-rising)
4 TBSP Sugar
2 TBSP Cocoa
1 egg
3 TBSP Milk
3 TBSP Oil
Small Splash of Vanilla
3 TBSP Chocolate Chips (optional)


Add dry ingredients to mug, mix well with a fork. Add egg and mix thoroughly. Pour in milk, oil, & vanilla, mix well. Add chips, if using. Put mug in microwave and cook for three minutes on 1000 watts. Cake will rise over mug - do not be alarmed! Allow to cool a little, tip onto a plate if desired.


GLAZE (optional)


1/3 powdered sugar
1 1/2 TSP dry flavoring (such as cocoa powder, vanilla powder or lemonade mix - to match cake used)
1 1/2 TSP milk


Mix all ingredients and then pour over cake - EAT AND ENJOY!

Thursday, November 18, 2010

LOVE THE PIE party entry!

FRENCH SILK PIE
(a special recipe from my BFF Jaci Laney)

Pie:
1/2 C. Butter (softened, NOT melted - very important)
3/4 Sugar
1 oz. Semisweet Chocolate Square (melted)
3 TBLS Cocoa
1 Tsp Vanilla
2 Eggs
1 Pie Crust (Pillsbury frozen kind is an excellent flaky one to use)

Topping:
1 C. Whipping Cream
1 Tsp. Vanilla
1/4 C. Powdered Sugar

Bake pie crust so it can be cooling. Beat butter and sugar until fluffy. Add semi-sweet chocolate square, cocoa and vanilla until very well blended. Add 1 egg and beat on high for at least 5 minutes. Add the 2nd egg and beat another 5 minutes. Make sure your chocolate has turned a lighter color. Then pour it in baked cooled crust and refrigerate 2 hours (I sometimes freeze it to make sure it sets!). Meanwhile in another bowl beat whipping cream until stiff peaks form. Add vanilla and powdered sugar to whipping cream. Pour over pie. Garnish with your choice - I take another semisweet baking chocolate square and shave off some onto the top.

(Because I didn't know about the awesome LOVE THE PIE party until today I didn't have time to make the pie and take pictures as I usually would so this picture is courtesy of BakeMeMore.com - just click the photo for link)

Saturday, May 15, 2010

Cracker Chicken

I finally cooked one of my husband's absolutely favorite meals again the other day. And half way through making it realized I wanted to blog the recipe so I captured a few pictures! The recipe is for Cracker Chicken and is family-friendly! (No really, it is!) Here is how simple it is:

CRACKER CHICKEN

4 breasts of cooked chicken, diced
Can of Cream of Chicken
1/2 Tub of Sour Cream (about a cup, or cup and a half)
1 package of Ritz Crackers
1 stick of butter

Combine cooked diced chicken in bowl with sour cream and cream of chicken. Pour into 8x8 (or 9 x 13 if you double the recipe - serves 4 to 5).

Melt stick of butter completely. Place Ritz crackers in gallon size Ziploc bag and seal. Beat the crackers in the bag until they are completely crushed into crumbs. Pour crumbs into melted butter and mix.
Then sprinkle the butter/cracker mixture over top of chicken.


Use all of it, coating well. Then pop in 35o degree oven for 1 hour.

It will be nice and bubbly when done! ENJOY!!

Monday, April 26, 2010

Pancake Topping Recipe

OK if that picture makes your mouth water then your taste buds are in TUNE! Because this Pear Topping is DEE-LISH! And here's the best part they are SO easy!! Doesn't look like it right? Oh but it is!

Here's the secret: Use CANNED pears! GASP! I know. Canned pears. Okay now that we are past that. Pour a little bit of REAL Maple Syrup in a frying pan and cook the pears just until well coated and heated. Also sprinkle a little bit of cinnamon on them right before you are done. Then slap em on your favorite pancake recipe and you are headed for taste bud heaven!
(Also if you don't happen to have real maple syrup in your cupboards you can substitute molasses just as easily and they both taste great!)

No I can't leave so soon because I HAVE to share with you this COMPLETELY HEALTHY Anti-Inflammatory Pancake recipe of mine that truly tastes delicious! I know completely healthy and delicious don't go together in most people's minds but these are truly good. (If you don't agree apparently we have opposite tastes!)

Almond Flour Pancakes

2/3 Cup whole-curd cottage cheese
3 large eggs
1/2 Cup Bob Red Mill's Almond Flour
1/8 Tsp. Vanilla Extract
1/8 Tsp. Ground Cinnamon
2 TBLS Oat Bran

1. In a large mixing bowl combine all ingredients except oat bran. Beat until smooth.
2.Heat a nonstick griddle or large nonstick skillet.
3. For each pancake, pour about 3 TBLS of batter onto the griddle or skillet.
4. Sprinkle each pancake with oat bran (I sprinkle the batter side as the first side cooks - and go LIGHTLY or you will end up tasting it)
5. Cook pancakes 1 to 2 minutes until puffed and dry around edges. Turn and cook other side until golden brown.

Friday, April 2, 2010

St. Patty's Day Recap

ERIN GO BRAGH! That was the theme around our house on March 17th! For if you couldn't tell we are Irish and proud of it! I had a handful of things I wanted to do with my kids and most of them got done! Yay! We started by reading a book all about St. Patrick's Day. It explained the history, why we celebrate, how most celebrate and so and so forth. It was written for kids so it was short enough to keep their attention. The best quote from the day came from reading this book, allow me to break it down for you. We turn the page to a picture of St. Patrick and it explains who the actual man is. When I point to the picture and say "See this is him here." My son goes "Mom that's not Patrick. Patrick is a starfish!" Oh you got to love children. (If you are out of mom loop he was referring to Spongebob Squarepant's best friend Patrick the Star Fish.)

Anyways after knowing ABOUT the day we started our festivities. First things first find some clovers! We had some growing around our yard so I made them go out and hunt for them. I eventually had to help give them a general area to look in because they kept pulling everything green out of my yard saying "Is this a clover???" We found the clovers and took a quick pic on my phone of which was sent immediately to Mima and Papa to wish them Happy St. Patrick's Day.

2nd we painted some on our faces. Since now we knew what they looked like! I painted proper heart shaped three leaf clovers on both my kiddos but by me I got lazy and did a quick circle 4-leaf one. I know. Shame on me.


Since my clover wasn't up to par - I had fun playing with this photo in my editing program, lol - and no I didn't go for good - just goofy mainly! (see below)

We then made really adorable Clover pins to wear proudly on our green shirts (or dresses if you are Gracie) - but this will be saved for a separate craft post.
So then in the hot afternoon we made some Leprechaun milkshakes to cool off! These were so fun for the kids and made a yummy snack!

Just vanilla ice-cream, milk and green food dye.


Ta-da! Looks like slime in the pic but I promise it was dairy goodness.

This was gone about 5 seconds later. Well maybe 2 minutes later, considering 5 seconds would result in a massive brain freeze!

I was watching one of our neighbor's kids that day so all three kiddos enjoyed slurping up their Leprechaun milkshakes!


This picture doesn't even need a comment it's so cute! So hope everyone had a Happy St. Patrick's Day!!!

Wednesday, March 10, 2010

Lemon Cakes

I lied. I know, it's wrong. However I would like to make this entire post and then at the end explain to you why I lied. And honestly I think you will agree. Yes I am justifying my sin. Just go with it for a second, it will make me feel better.

Okay to my post which is titled "Lemon Cakes". I have done WAY to much food blog-hopping lately which has resulted in a couple pounds added to my weight, as well as an explosion on my taste buds! We are talking GOOD STUFF here. I posted on my beef stew and Rosemary Dinner Rolls. A couple other things I have experimented with have been Orange Julius', Oreo & White Chocolate Chip Brownies, and...yes there were more but there was enough sugar in the last two to spare you the rest of my list. Ooh I did balance out with trying Steel Cut Oats! Which I highly recommend also! (They are also referred to as Irish oats which I found fitting with St. Patrick's Day next week) But one experiment was these "Lemon Cakes". They were SO yummy and delicious and you make them in a very unique way which is what caught my attention in the first place. With no further ado...

And I honestly planned on having the entire recipe right HERE for you to print out but my computer is playing ornery with me so instead I have a link to the blog Pioneer Woman that I got it from. It's actually cool because she gives a step by step with a picture per step for you! So go over there and TRY it! It's worth it! (Either link will take you straight to the cakes)

Okay now if you went to the link before reading the rest of this post you may have already figured out my lie. They are NOT called Lemon Cakes. Yet my argument is they should be. The name they have makes them sounds awful and NOT inviting and as yummy as these things are they SO DESERVE a yummy sounding name! These unique cakes are made with olive oil and so their true name is Olive Oil Cakes w/ Lemon and Thyme. Okay. Do you see my point? Nuff said.

Tuesday, February 16, 2010

Rosemary Dinner Rolls and Beef Stew

Unfortunately today found me at home with two sick family members - my hubby and my little 3 year old daughter. It's been a lot of laundry and crackers around this household this morning. Yet since I am at home playing nurse to both of them I thankfully had some leftovers to heat up for lunch; which then reminded me I was going to blog their recipes for you! So first let me celebrate again that I finally found my camera installation Cd's and can finally get my camera to download pics to my new computer!!!! So let me install that real quick and then we'll continue with the post...

Okay so 7 hours later (no I'm not kidding: By the time it was installed it was time to get my son from school, then I needed to take the moment to get some desperately needed groceries, then home to play nurse, cook dinner...well you get the point) I am finally ready to show you my wonderful stew and rolls I made! The stew was very easy and the most delicious I have had in a very long time! Although I must admit that favoritism is partly due to the meat alone. It was SO tender it wasn't even funny! YUMMY!

Okay, okay I will control myself. You start out by simply placing the flour, salt and pepper in a large Ziploc bag and shaking it with the meat until the meat is well coated. My kids held the bag while I dropped each item in it. Then you heat up the oil in a large pot and brown the meat
Ah now doesn't that look good already? If you answered no, just exit this web page RIGHT NOW!
Then you will add 5 cups of water and 5 beef bouillon cubes. (And I want to apologize for my pictures from here on out, they are a bit blurry because I still had my camera setting on "AV" from my photo challenge the other day and when you are cooking with one hand and taking a picture with the other you can't always MAKE SURE the photos are in focus. So my bad) After that you will add your other spices and then cover and let it simmer for an hour.
The last steps include adding the carrots, simmer a little longer, then the green beans. And don't forget to make up your dumpling mixture while the carrots are tenderizing so after your soup is complete you can add them by spoonfuls and cover it back up until they have become fluffy pieces of yummy goodness! Here is the final product:
OKAY now for the real treat of our dinner the other night: Rosemary Buttered Dinner Rolls!!! I won't go into detail on the makings of these because I will simply send you to the link where I found them so credit is where credit is due.
You can find this yummy recipe at Pioneer Woman - cooking.
OOOOHHHH my mouth is watering again! I baked 10 of these babies up and between my husband and I and my children (may I mention my YOUNG children) we devoured ALL 10 in that one sitting! Bad I know, but oh so good!
Now here is the full recipe for the Beef Stew with Cheddar Dumplings:
BEEF STEW W/ CHEDDAR DUMPLINGS
1/2 C. all-purpose flour
1/2 tsp. salt
1/2 tsp. pepper
2 lbs. beef stew meat, cut into 1 inch cubes
2 TBLS. Vegetable oil
5 C. water
5 beef bouillon cubes
1/2 tsp. onion salt
1/2 tsp. garlic salt
1 TBLS. browning sauce (I omitted this)
4 carrots, sliced
1 medium onion, cut into wedges (I also omitted this)
1 can green beans, drained
DUMPLINGS:
2 C. Biscuit/Baking mix
1 C. shredded cheddar cheese
2/3 C. milk
In a large resealable bag, combine flour, salt and pepper. Add beef, a few pieces at a time, and shake to coat. In a Dutch Oven (I used a regular large cooking pot w/ lid), heat oil over medium-high. Brown meat on all sides; drain. Add water, bouillon, onion salt, garlic salt and browning sauce if desired; bring to a boil. Reduce heat; cover and simmer for 1 hour. Add carrots and onion. Cover and simmer until the vegetables are tender. Stir in green beans. For dumplings, combine biscuit mix and cheese. Stir in enough milk to form a soft dough. Drop by tablespoonful onto simmering stew. Cover and simmer for 12 minutes (do NOT lift cover during this to peak) or until dumplings test done. Serve immediately.
SERVES: 6
FROM: "The Complete Guide to Country Cooking" entry by Jackie Riley of Garrettsville, Ohio

Monday, February 8, 2010

Featured blog: Valentine's Crafts

I was trying to make myself wait one more day at least before doing another post because of course I have a ton of post ideas running through my head. But when I saw these cute craft ideas for kids I had to share it! If you have young kids and want to let them get creative and have a blast with your kids too visit Cassie & Co. blog for cute ideas like Number counting book and stained glass hearts!


And also since I'm on here I might as well share with you a dessert I also found blog hopping that as soon as my hubby walked in the door tonight I held my Droid phone up to him with a delectable picture of a Oreo Brownie with White Chocolate and declared "This is what I'm making for Valentine's Day!!" In case the name alone didn't get your taste buds salivating here is a picture of it:


It is from a new blog I just found tonight called "Two Peas and their Pod", a cooking blog. Check it out for numerous yummy recipes including this one!
Click HERE for the Oreo Cookie Brownie with White Chocolate recipe.

Thursday, October 29, 2009

Autumn Festivities have begun...(recipe included)

Even though we live in Texas the weather HAS finally turned cool and it has been rushed in with a LOT of rain! But I am grateful for the rain after such a dry summer. Anyways Autumn is officially here and between reading my Better Home and Garden magazines, wearing sweaters and jackets, watching the trees turn colors, AND looking at my neighbor's cute Fall wreaths all hanging on their doors I have gotten my inspiration back!!


So here are some of the things I have done to welcome the new season:

1. Put out all my Autumn house decorations (my theme is scarecrow)

2. Changed my counter "grab" bowls to Almonds (for me) and Candy Corn (for the kiddos)

3. Went through the kids closets and bagged up all the "summer" clothes that were getting to small or WAS too small and accidentally stood hanging in their closet anyways!

4. Spent all week going store to store to find all the ingredients to make these adorable Pumpkin Patch cupcakes for Tyler's class party today at school! (Recipe and pictures below)

5. Looked through tons of pumpkin carving pics with my kids on the Internet until Tyler saw a "bats" one that he exclaimed "It's BATMAN!" So I cut the pumpkin open and let the kids help me separate out the seeds (to bake later) and we carved a wonderful "Bats in flight" pumpkin for our porch.

6. And oh yea I bought some Pumpkin Spice Coffee Creamer (even though I seriously hardly EVER drink coffee it just seemed right to do, haha)

So what have you done to welcome in the cooler weather? Maybe it already feels like winter where you are but none-the-less share what you have done!


PUMPKIN SPICE CUPCAKES
(makes 12 regular and 24 mini)

1 box French Vanilla Cake Mix
1 cup canned pumpkin
1 teaspoon pumpkin pie spice
3/4 cup buttermilk (in place of the water called for on the box)
1/3 cup vegetable oil
4 large eggs (in place of the number called for on the box)

After adjusting ingredients, make as directed on box. (Beating the batter is very important - your batter will be very lumpy if you just stir)

Place half the dough in a Ziploc bag (turn inside out and push down on one corner into your palm to scoop batter into the corner specifically then continue to fill) and cut 1/4 in. hole at corner of bag and fill the paper liners 2/3's full.
- Use orange paper liners for regular size cupcakes
- Use white paper liners for mini size cupcakes

DECORATING (to make PUMPKIN PATCH CUPCAKES)

4 green licorice twists (Twizzlers Rainbow Twists)
1 can plus 1 cup vanilla frosting
Orange Food coloring
1 cup orange decorating sugar
Green Licorice Laces (Watermelon Madness Fruit Streamers)

1. Cut the licorice twists into thirty-six 3/4-inch pieces for the pumpkin stems. Tint the vanilla frosting orange with the food coloring. Tint 1/2 cup of the orange frosting a darker shade of orange with more food coloring, and spoon into a Ziploc bag. Press out the excess air, seal the bag, and set aside.
2. Place the orange decorating sugar in a shallow bowl. Spread the lighter orange frosting on top of the cupcakes, mounding it slightly. Starting on the edge, roll the cupcake tops in the sugar to cover completely.

3. Use a wooden skewer to mark ridges in the top of each cupcake. Starting in the center or slightly off center, lightly press the skewer down toward the top of the paper liner to create 5 or 6 indentations. Snip a 1/16-inch corner from the bag with the darker orange frosting and pipe a line in each indentation to make the ribs. Insert a cut green twist for the stem. Arrange the cupcakes on a serving platter or a cutting board and add green licorice laces, trimmed to various lengths, for the tendrils.